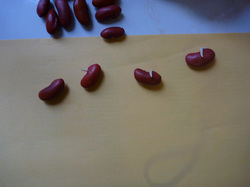
We wanted to learn about how plants grow. This is how we did it: We put bean seeds in a jar with a little water to see what came out first, the root or the stem. They started growing but then they dried out. We investigated bean seeds. First we looked at the outside. It had a strong coat to protect the seed. It was brown with little lines. Then we opened the seeds to see what was inside. We thought it looked white or yellow with baby leaves and pointy tubes. We learned that inside a seed is a cotyledon. This is the food for the baby plant.
Step 2
A bean germinating. You can see the cotyledons!
Next, we planted seeds in the dirt. We got to choose which seeds to plant. We chose corn, beans, tomatoes, and carrots. We planted the seeds in six pack pots. The soil was dark brown because it is healthy for the plants. It has more nutrients. Nutrients are the healthy things in the dirt. We watered them and put them near the window under lights.
Step 3
We waited for the plants to grow. When they germinated, we wrote about them in our Plant Observation Logs. We included the date, the observation number, a drawing, and a description of our plant.
The most exciting part about growing plants in our room was when they began to flower. The bean and squash plants grew flowers, and the beans grew fruit! We could have eaten them or grown more beans even though it was winter.
Step 4
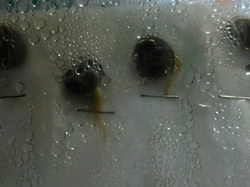
The root emerges from the seed coat.
We charted about how plants grow. We figured out that they go through a life cycle. We were still missing a step in this cycle so we did one last experiment. We put paper towel, water and sunflower seeds in a plastic bag and taped them in the window. We wanted to figure out which comes out of the seed coat first: the roots or the stem. The roots came out first!
Step 5
To finish our work on plants, we made plant life cycle projects. Check out our projects here!